Tuesday, October 21, 2014

5 amazing security tips for your android mobile/cellphone

Posted by Muji


There are a plenty of security applications in the Google Play store that help you defend your Android phone and offer choices that expand your possibilities of spotting your lost (or stolen) mobile.

Besides all the basic security tips like locking the mobile and SIM card, activating anti-theft in mobile. today im gonna show you some useful security tips for protecting your android.

Prey and Where's My Driod:

Prey and Where's My Droid are the two application with which you can send multiple command to your lost phone to execute the commands without your existence.

Android Device Manager:

Android Device Manager shows a list of all Android phones and tablets that are connected to your Google Account and helps you locate them on a Google Map. You can ring your phone (in case it is hiding somewhere you can't spot) from the browser, lock the device with a custom PIN or perform a factory reset which permanently deletes all the data on your phone. The mobile should be connected to data connection either its may be a mobile data or WiFi


Anti-Theft Alarm:

When you are charging your cell phone at a public station, you either have to watch the device all the time or you can activate the Anti-Theft Alarm app and relax a bit. The app will trigger a siren sound when someone disconnects the charger and your phone screen will flash continuously until the correct pin is entered. You can go a step further and configure the app to trigger an alert when someone moves the phone even a few inches from the original position.

Recommended for you: How To Download Youtube and Facebook Videos Without Any Software


LockWatch:

Another Android App LockWatch records the phone’s location and captures a picture with a front camera when someone attempts to unlock the phone but enters a wrong PIN or password. This information is send to your email address and it happen silently so the intruder would never know that their activity has been recorded.

Author's Note: If you liked my article please do share with your friends. Also please subscribe to the news letter for more awesome tricks and tips.

Read More

How to use two whatsapp accounts in a single mobile/cellphone

Posted by Muji
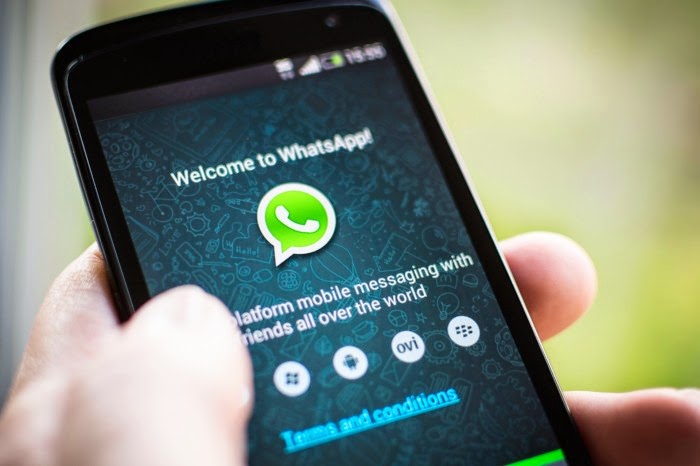
No Doubt WhatsApp is one of the most popular and downloaded messaging app. Most of the android users are using the same to connect with their friends. But if you have the dual sim phone than its difficult for your to setup two number on the Whatsapp and the application didn’t provide any option to use both the number on the same app. Now you can do the same on your device with he the simple trick. All credit goes to the XDA Member OsamaGhareeb, who recently released the modified version of whatsapp called OGWhatsApp. With the help of this application you can easily use two numbers on the whatsapp messaging application. The app is based on the latest WhatsApp version and works on any android device.

To get started all you have to install the modded version of whatsapp on your phone and make some change with the help of file explorer, and you are done. Lets take a look how to setup the application and use two numbers in WhatsApp at the same time.

Follow the below to get on the procedure

Step 1. Run the Whatsapp app on your application and go the Chat Settings and take the backup of your Whatsapp messages first. Its optional in case you want the restore your messages.


Step 2. Now Change the name of the folder /sdcard/WhatsApp on your device to /sdcard/OGWhatsApp. Use any file explorer (Like ES File Explorer or Astro File manager )to do this on your phone.


Step 3. Now uninstall the WhatsApp on your device and install the Modified version of OGWhatsApp here on your device.

Step 4. Now run the OGWhatsApp on your phone and use the old number which are you using on the whatsapp.

Step 5. Now Go to the Google play Store and install the official version of Whats app on your phone and use the new number on this application.

That’s it. Now you will see two Whatsapp icons on the homescreen of your phone from which you can use two number for the messaging.

Author's Note: If you liked my article please do share with your friends. Also please subscribe to the news letter for more awesome tricks and tips.


Related Keywords:
how to install whatsapp on android phone, how to install whatsapp on android phone from pc, download whatsapp for android phone, whatsapp for android 2.2 free download, how to use whatsapp on android tablet, how to use whatsapp on android tablet without sim card, how to use whatsapp on android emulator
how to use whatsapp on android sdk
Read More

How to shutdown/turn off PC/Computer with your mobile/cellphone device

Posted by Muji

What if you are out of your home and you are not sure whether you have shut your PC down or not?

Or what if you got a doubt that somebody else is using your system when you are not home?

Or what if somebody is accessing your private data and you want to shut your system down without knowing them?


Well I have a small trick for you.

All you can do with this trick is Shutdown Computer/Lappy with a Cell Phone

Using this method, a user can shutdown, restart, hibernate, etc. his or her computer, just by sending an email from his or her phone.

To do this, all you will need is Microsoft Outlook which should come with Microsoft Office, which most people have. This will need to be on the computer wish you wish to shutdown.

So, this is how you do this:

1. First, you need the batch files to perform the Shutdown, Hibernate etc. You can write them down yourselves.

2. Open your Notepad and write the following code

c:\windows\system32\shutdown -s -f -t 00

and save it as shutdown.bat (remember .bat is mandatory in order run this trick)

3. Open up Microsoft Outlook. Make sure that you have already configured it for your email. Now we need to make it so that Outlook checks your inbox about every minute (1 minute for testing time can be increased if a delayed shutdown is desired). You can do this by going to Tools --> Options in Microsoft Outlook.

4. Then click the Mail Setup tab, and afterwards, the Send/Receive button.

5. Make sure that the Schedule an automatic send/receive every box is checked, and set the number of minutes to 1. Now you may close all of these dialog boxes.

6. Now go to Tools --> Rules and Alerts. Next click the options button in the upper right hand corner and press the Import Rules button.

7. Now select the shutdown.bat file which you have created earlier.

8. Now, when you send a message from your phone to your e-mail address with the subject shutdown or smsshutdown%%, your computer will shutdown.

Author's Note: If you liked my article please do share with your friends. Also please subscribe to the news letter for more awesome tricks and tips.

Read More

Monday, October 20, 2014

Easy Steps On How To Run Whatsapp On PC

Posted by Chaithanya
Now-a- days whatsapp is a largest messaging platform where on can send messages for free of cost. It had became quiet popular and also the mostly used messaging application. It has 300 million customers world wide and 20 million customers alone in India. It can be used on mobile platforms like Android, Apple IOS, Windows, Blackberry. And now you can also use whatsapp in your PC also. Many members know this option, but they don't know how to install and run whatsapp on PC.

Here we will discuss easy steps on how to run whatsapp on pc by using Blue Stacks.


  • Download Blue Stacks application for Windows (free version)
                                               Download Bluestacks for Windows

  • After finishing download, double click on the downloaded file, Click continue and click install
  • Now download whatsapp apk for windows 
                                               Whatsapp APK for Windows

  • Now double click on the downloaded file and run it. Now whatsapp will be installed in your PC
  • Now open Blue Stacks icon on your desktop
  • Now in Blue Stacks --> Click My Apps
  • You can see Whatsapp --> click it
  • Accept terms and conditions that are provided
  • Now type your number in the mobile number field
  • Type Your Country Code before the number. For Ex. type 91 for Indian mobile numbers and respective codes for other countries.
  • Now Whats app will verify your number, but it shows a failure message
  • Now click on call me option --> You will receive a call back with a confirmation number. Write it down.
  • Now type the received number in the verification field and you are done. 
Now your whatsapp will run on PC. Enjoy it

we will discuss on how to add contacts to whatsapp

Step 1 : Open Whatsapp in BlueStack

Step 2: Click on Menu icon at the bottom

Step 3 : Now click on contacts icon

Step 4: Click on add contact

Step 5: Fill the required fields with name and number

Now you are done with your contacts list

This is the main procedure on how to run whatsapp on pc. Try it.
Read More

Facebook for Android APK Direct Download Link

Posted by Chaithanya
Facebook for android is a very popular application. But accessing the previous versions of facebook has become very tough. Facebook has been developing considerably new versions of facebook for android apk's  to make facebook experience comfortable. Now it has come up with new version facebook for android apk where the users can enjoy the rich experience at the time of browsing.


In this new version many changes are made to enhance the experience. The main changes that are made here are 
  • A new look and other design updates 
  • You can quickly navigate to different areas by simply swiping the screen
  • You can search anywhere with the new search button
  • More recent feeds and other feeds can be seen on right 
  • Reliability and speed are increased
You can download the facebook for android apk here


You can also download it from google play store.

Read More

Saturday, October 18, 2014

How to customize Blogger with Godaddy

Posted by Muji

What is it?

All the blogs in this planet spaced for the uniqueness. Unless you got an unique property you are not going to be shined to the edge. The same property will effect to core in choosing the default blogger domain i.e., sub-domain of blogspot.com or blogger.com.

Set Up A Custom Domain With Godaddy In Blogger - A Step By Step Procedure

To get your uniqueness effect I suggest you to set your default sub-domain of blogspot.com to custom domain with Godaddy. The main advantage of setting a custom domain is you will get an official representation of your website,

What are the advantages?

1) You will be noted on a special note in search engine directories and will be easier to index your content. SEO made easier.
2) It is easier to submit your website into directories and are more chances to get approved to be listed.
3) Your blog is no more a blog. It is a website now.
4. It will be more easier to spread the word, popularize or to pronounce the website name rather than adding blogspot.com or wordpress.com in the end.
5. You will get a personalized email like as info@website.com so that to aware audience yours is a unique website.
6. Last but not least, there are more chances to get approved by Adsense if you have a custom domain.

Looks good, is it easier?

Of-course its looks good and easier too. May be its a bit difficult for the first time but only for the first time.

Google provides us very easier process to set up a custom domain with blogger as blogger is owned by Google itself.

It takes about 10 mins to set up a custom domain with Godaddy in your blogger for the first time and for the rest of times it will be about 5 to 7 mins of process.

Why choose GoDaddy when there are many other hosting services?

Good question, why i'm choosing godaddy is

1) It's cheaper: Yes can you believe that you can change your blog into website for just 2$? or Rs 120/- ? They provide the same service for us

2) It's easier: All you have to do is signing up, buying domain, setting DNS settings (Will talk about DNS settings later) that's it.

3) It's faster: Damn its so fast that the next second of the settings you can have your website live while other hosting services may take up to 24 hours to bring it on live.

What else could you expect if these are only the main things to buy a domain and customize it?

Okay, go ahead. Show me the process:

Well there are 3 main steps in this process

1) Buying your domain
2) Setting your DNS settings
3) Feel awesome!

Buying your domain in GoDaddy:

1) Go to Godaddy website by clicking here

2) Choose your domain by entering your desired domain in the box and search whether its available or not

Set Up A Custom Domain With Godaddy In Blogger

3. Now click on continue to cart and buy the domain.

Step 1 Completed 

Now, Setting Your DNS (Domain Name Server) Settings:

1. Go to your blogger dashboard.
2. Navigate to Settings > Basic
3. Now click on + Setup a 3rd party URL for your blog

Set Up A Custom Domain With Godaddy In Blogger


4. Now enter your website name in the box eg: www.mywebsite.com

Set Up A Custom Domain With Godaddy In Blogger - A Step By Step Procedure


5. Click on save. Here you will see an error "We have not been able to verify your authority to this domain. Error 12" because you haven't set your DNS settings with GoDaddy yet.

Set Up A Custom Domain With Godaddy In Blogger - A Step By Step Procedure


6. In the error part you can see two set of lines with codes. Just dont close this page as we require this codes later in DNS settings in GoDaddy.

Set Up A Custom Domain With Godaddy In Blogger - A Step By Step Procedure


7. Now login into the GoDaddy website with which you have signed up during the process of Domain purchase.

8 Click on My Account at the top of the website or Domains at the middle

Set Up A Custom Domain With Godaddy In Blogger - A Step By Step Procedure


9. Now Click on Launch Button

Set Up A Custom Domain With Godaddy In Blogger - A Step By Step Procedure


10. You will get an page opened Names Domain Details. Click on DNS Zone File in that page

Set Up A Custom Domain With Godaddy In Blogger - A Step By Step Procedure


11. Now click on Use classic DNS Manager

Set Up A Custom Domain With Godaddy In Blogger - A Step By Step Procedure


12.  Now you will get a Page named Zone File Editor. There you will find first two tables called A (Host) and CNAME (Alias) respectively.

Set Up A Custom Domain With Godaddy In Blogger - A Step By Step Procedure


13. Now just below the CNAME (Alias) table there will be a button to add CNAMES to the table namely Quick Add. Click on it and enter two set of lines of code that are available in blogger settings page

Set Up A Custom Domain With Godaddy In Blogger - A Step By Step Procedure

14. Now click on SAVE FILE ZONE

Set Up A Custom Domain With Godaddy In Blogger - A Step By Step Procedure

15.  Refresh the page and now add following records to A (Host) table by clicking Quick Add button.
First BoxSecond Box
@216.239.32.21
@216.239.34.21
@216.239.36.21
@216.239.38.21
Set Up A Custom Domain With Godaddy In Blogger - A Step By Step Procedure
16. Now click again on SAVE FILE ZONE. Come back blogger settings page and clic on save button.
Set Up A Custom Domain With Godaddy In Blogger - A Step By Step Procedure

17. After saving you can see the error disappeared for the page and you will see page something like this.
 
Set Up A Custom Domain With Godaddy In Blogger - A Step By Step Procedure

18. To make sure that you are redirecting mywebsite.com to www.mywebsite.com click on Edit in above image and checkoption.
Set Up A Custom Domain With Godaddy In Blogger - A Step By Step Procedure

19. That's it! Now click on save as shown above. I know its bit lengthy process but i assure you its only for beginners. If you got two more blogs try this on them and I can bet you can do this whole process in a single shot.
Step 2 Completed 

20. Now sit back and relax for two mins. After two minutes open your blog ans see your URL changing to your domain name automatically.

Step 3 Completed 


Author's Note: If you liked my article please do share with your friends. Also please subscribe to the news letter for more awesome tricks and tips.

Read More

Friday, October 17, 2014

Now You Can Transfer Money Through Facebook

Posted by Chaithanya

In olden days, money is transferred through banks. Now-a-days every thing is on online and the cash transfer also became online. We can transfer through net banking, online transfer, transfer through card etc. 

But as Facebook rules all over the world, the money can be transferred through Facebook. Banks made an platform in the site where you can transfer money. Private sector banks like Kotak Mahindra Bank has already launched instant fund transfer service in India and also many banks have followed the procedure. KMB provides their users where they can transfer the fund to their friends on social media network real time and with absolute free cost. 

It says, it can transfer the money via Facebook and the sender and receiver may not be the KMB customers. It uses IMPS (immediate payment service) platform where the money can be transferred. The IMPS platform has 28 banks under it and provide authority to transfer your funds. The sender has to first register on a dedicated website for the initiative called "Kay Pay" where we have to provide all the details and your bank account number and bank's MMID (mobile money identification number) apart from personal credentials.

Once the user has registered, he can initiate the fund transfer.

It is totally secured even in the event of Facebook account because it provides the two factor authentication to complete the transaction. And also it provides the expiry time for the transaction.

At present, top banks like ICICI allows their users to transfer the money through the social networking site Facebook.
Read More

Friday, August 1, 2014

How I Made $600 With A Event Based Blog - Make Money Online

Posted by Muji


Making money out of a blog is the common thing that most of the bloggers do. Thinking in the same view I planned to do something to play with money around on this Ramadan. Although my intention was not making money but to improve my knowledge regarding to Blogging and SEO.

Though I made some mistakes during the creation and maintain process of this very blog I have took some serious steps too which lead me to my destination.

Revealing all rock steps that I have learnt in few days during Ramadan.

Choosing an awesome custom domain:

The first step ofcourse a very important step when you are on with a Event Based Blogging. You have to choose a very catchy domain and should be related with event partially or completely. You should not rely on blogspot.com default sub-domain, you have to buy an custom domain.

Learn How To Set Up A Custom Domain In Blogger With GoDaddy.

Its no wrong if you choose a domain by searching keywords but make sure you don't choose a long tail keywords that embarrass visitor.

If your blog is about cooking, try domains like cookingspot.com, cookingcorner.com not as iliketocook.com, cookingismyhobby.com. Long domains are hardly attractive and are only clickable if and only if they are highly advertised.

Due to some security reasons I cant able to reveal my website name here.

Choosing a complete responsive, attractive and easy to navigate template:

Making your blog or website responsive is your responsibility. You should not be done with making your website attractive but also responsive. Visitors are likely to leave your website if your website looks awkward in mobile or tablet. Take time for mobile visitors as they also play key role in website statistics. Give them a easy way to navigate from one page to another page easily for all type of users.

As said above, in order to select an responsive and attractive template I selected one of the default templates  in blogger and edited it myself according to my convenience and it went well.

Meta Tags and Meta Descriptions:

One of the main key play roles is meta tags and descriptions. As i'm using adwords it was not that hard for me to find out high SERP keywords to set in meta tags and wrote a catchy description in meta description.

Content is king:

Of-course the content is king. No matter what ever I do in my website, if there is no sufficient content i'm going nowhere with my website. I tried to be more efficient, reliable and genuine while writing content as visitors should get more unique experience.

Making content beautiful for both visitors and Search Engines:

Unless my content is represented in beautiful manner visitor doesn't stay way long in my website. I tried to represent the data in beautiful and attractive way by choosing relative images and relative and long tail keywords.

I used Google Adwords for Keywords and Long tail keywords. Keywords are the only things which helped me to make my website to do good in SERP. I selected some high priority keywords and inserted them in between content. I also used more number of keywords, although it comes under black hat technique as mine is a event based blog I didn't cared about the danger of un-indexing my blog from SERP.

Better Title for Better SEO:

Selecting the title is next main important thing. I made all the titles looks like the most searched queries from adwords. You just have to select a most searched query from adwords and insert into the title and mainly prefer for long keywords which are otherwise called as Long Tail Keywords. Titles that has high priority keywords which are in H1 tags are the heart to website and it was in my mind all the time.

Spreading the word:

Nothing but sharing. Sharing includes one of the best SEO technique that is commenting in other blogs similar to our blog. I chose many of the blogs which are related to my event and made comments on those websites.

One point that you have to clearly observe is commenting on other blogs is mostly done for the boost of alexa rank but here I used the same technique to spread my website among admins and other viewers because there is no niche for wishes and no boundaries for people to wish.

Sharing mainly includes use of Social Networking Sites mainly Google+. If you are thinking about facebook you are absolutely wrong. Facebook is the next thing that should be considered but before that I went for Google+ because it will share the post among the people in our circle and next big thing is google automatically indexes the content to the in its directory. Ultra fair, isn't it?

Master of SEO tools Webmaster Tools:

The frequent thing I used while developing my event based blog is webmaster tools. I used it every often time and I used it to submit my site's sitemap everyday without fail. I also made use of Fetch as Google tool as it also helps in indexing the site's data very fast.

Result:

As a result I got traffic of about 110000 visitors (both new and returning) which earned about $623 in just one day with an RPM of 9 as I made adsense as my primary income method.

Following is the report generated from Google analytics for the dates July 29 to July 30

And following is the adsense report for the dates July 29 and July 30


Final Words:

All the above things that i did went very well and gave me more confidence to move towards my blogging journey. 

All i want to say is making money is the not only the thing, as i said earlier i did this experiment for only to improve my knowledge regarding to Blogging and SEO. 

Still if you have any doubts hope you will use comment box below.
Read More

Tuesday, July 29, 2014

Protect Your Files With Password Without Using Any Software

Posted by Chaithanya
Password Protect Any Folder Without Any Software

In your PC you will be maintaining many files. In that some are very important to you and you want to protect it from others. For this you will be using some of software's. But there is a way in your computer in which you can maintain password for your file folders. Here we discuss some of the points where you can make your passwords in your PC without using any software's.

1. Open your notepad and copy the code below in it.
cls
@ECHO OFF
title alltechcorner.com
if EXIST "Control Panel.{21EC2020-3AEA-1069-A2DD-08002B30309D}" goto UNLOCK
if NOT EXIST MyFolder goto MDMyFolder
: CONFIRM
echo Are you sure to lock this folder? (Y/N)
set/p "cho=>"
if %cho%==Y goto LOCK
if %cho%==y goto LOCK
if %cho%==n goto END
if %cho%==N goto END
echo Invalid choice.
goto CONFIRM
: LOCK
ren MyFolder "Control Panel.{21EC2020-3AEA-1069-A2DD-08002B30309D}"
attrib +h +s "Control Panel.{21EC2020-3AEA-1069-A2DD-08002B30309D}"
echo Folder locked
goto End
: UNLOCK
echo Enter password to Unlock Your Secure Folder
set/p "pass=>"
if NOT %pass%== alltechcorner goto FAIL
attrib -h -s "Control Panel.{21EC2020-3AEA-1069-A2DD-08002B30309D}"
ren "Control Panel.{21EC2020-3AEA-1069-A2DD-08002B30309D}" MyFolder
echo Folder Unlocked successfully
goto End
: FAIL
echo Invalid password
goto end
: MDMyFolder
md MyFolder
echo MyFolder created successfully
goto End
: End

2. Save the notepad file as lock.bat (.bat is must)
3. Now double click on lock.bat and new folder will be created with name MyFolder
4. Copy all your data you want to protect and place it in the New folder.
5. Now double click on lock.bat and when command prompt appears "Type Y" and press enter.
6. Now Myfolder will be hidden from your view, to access that folder double click on lock.bat
7. It will ask for password and enter it. (Here default password is alltechcorner)

To change the password replace "alltechcorner" with your new password.
Read More

Monday, July 28, 2014

Transfer Your Files Between PC And Android Wirelessly

Posted by Chaithanya

Transfer files between android and PC

You all have an idea to transfer files between your android phone and your PC. You will be doing this by connecting USB cable to your PC or you will have a card reader and attach your memory card to it and transfer it. 

What will you do when your PC USB ports are full and don't find your memory card and you want to transfer some important files? No need to worry. You have some applications to do the work. 

1. Android :

Android is an top application to transfer files between phone and PC. It requires size of 6.4 Mb and requires Android 2.1 version and above to run it. The key feature this app supports is desktop SMS service , wireless transfer of files and media, data and phone locating technique.

2. ES File Manager :

It's size varies with devices. It is commonly known as Android File Manager and it is used to transfer your files remotely. Just select "Remote manager" under the "Fast access" list, there you find local network that you have to connect to. Connect to the app by giving "ftp address" in your address bar in your computer and then transfer your files.

3. 3CX Droid Desktop :

It's also an application to transfer your files. It requires a size of 2.8 Mb and runs on a android platform 2.0 and above. For this you want to set up service port and password for your connection. Tap "start server" and an IP address is generated for your device, input the address and password on your computer and there will be a page displayed similar to desktop. 

3CX Droid also supports USB mode, Desktop SMS, Gallery Viewer, Media Player, FTP Server, WiFi Keyboard, Webcam, Screen Capture, Contact Manager, Remote Call, Wallpaper Utils, Etc.

So install these applications and make transferring files easy.
Read More

Schedule Your SMS And Social Messages With Schemes

Posted by Chaithanya

In our daily life we do many things. We wake at morning and we plan the works that we have to do through out the day. Social media also plays a major role in our life. We often check Facebook messages,Tweets and send messages to our beloved ones.

Sometimes we get so busy that we forgot to send birthday greetings to our beloved ones and we will be in a danger position at that times. At that times we think that "Is there any app to schedule my message, so that I cannot be in any danger. Yes, there is an app for you. Let's discuss it, how to use it.

Now at first we learn what is Schemes?

Schemes is an application that is used to schedule your messages via Facebook, Twitter, Email (Gmail only) and SMS. When you want to send your messages at a particular time. Tomorrow is your friend's birthday and you want to send your message at 12' o clock, then you can schedule your message by using this app.
Scheduling your messages


This app requires size of 4.7 Mb and runs on Android 2.3 version. It is a very user-friendly app and there are no more complications in using this app.

How to use this application ?


  1. One can easily use this application. You can write your message and schedule the time for it to go. You can be busy at that time so you can not send the message at that time, for this simply set the time to the message and rest will be done by this application.
  2. All you have to do is create a message by tapping on message icon. This take you to the compose screen where you can type your message to be sent, select recipient and also date and time.
  3. Setting date and time is also easy and messages can be scheduled to four networks simultaneously. You will receive a notification message indicating the time you have sent your message. You can also edit your time and also cancel the message. 
  4. To schedule your social messages, you have to connect your app with your social networks such as Facebook, Twitter and Gmail.
This application is safe and secure to send messages and it will store your messages in a thread form and they will be posted according to your schedule.
Read More

How To Set Up A Custom Domain With Godaddy In Blogger - A Step By Step Procedure

Posted by Muji
Set Up A Custom Domain With Godaddy In Blogger - A Step By Step Procedure

What is it?

All the blogs in this planet spaced for the uniqueness. Unless you got an unique property you are not going to be shined to the edge. The same property will effect to core in choosing the default blogger domain i.e., sub-domain of blogspot.com or blogger.com.

To get your uniqueness effect I suggest you to set your default sub-domain of blogspot.com to custom domain with Godaddy. The main advantage of setting a custom domain is you will get an official representation of your website,

What are the advantages?

1) You will be noted on a special note in search engine directories and will be easier to index your content. SEO made easier.
2) It is easier to submit your website into directories and are more chances to get approved to be listed.
3) Your blog is no more a blog. It is a website now.
4. It will be more easier to spread the word, popularize or to pronounce the website name rather than adding blogspot.com or wordpress.com in the end.
5. You will get a personalized email like as info@website.com so that to aware audience yours is a unique website.
6. Last but not least, there are more chances to get approved by Adsense if you have a custom domain.

Looks good, is it easier?

Of-course its looks good and easier too. May be its a bit difficult for the first time but only for the first time.

Google provides us very easier process to set up a custom domain with blogger as blogger is owned by Google itself.

It takes about 10 mins to set up a custom domain with Godaddy in your blogger for the first time and for the rest of times it will be about 5 to 7 mins of process.

Why choose GoDaddy when there are many other hosting services?

Good question, why i'm choosing godaddy is

1) It's cheaper: Yes can you believe that you can change your blog into website for just 2$? or Rs 120/- ? They provide the same service for us

2) It's easier: All you have to do is signing up, buying domain, setting DNS settings (Will talk about DNS settings later) that's it.

3) It's faster: Damn its so fast that the next second of the settings you can have your website live while other hosting services may take up to 24 hours to bring it on live.

What else could you expect if these are only the main things to buy a domain and customize it?

Okay, go ahead. Show me the process:

Well there are 3 main steps in this process

1) Buying your domain
2) Setting your DNS settings
3) Feel awesome!

Buying your domain in GoDaddy:

1) Go to Godaddy website by clicking here

2) Choose your domain by entering your desired domain in the box and search whether its available or not

Set Up A Custom Domain With Godaddy In Blogger

3. Now click on continue to cart and buy the domain.

Step 1 Completed 

Now, Setting Your DNS (Domain Name Server) Settings:

1. Go to your blogger dashboard.
2. Navigate to Settings > Basic
3. Now click on + Setup a 3rd party URL for your blog

Set Up A Custom Domain With Godaddy In Blogger


4. Now enter your website name in the box eg: www.mywebsite.com

Set Up A Custom Domain With Godaddy In Blogger - A Step By Step Procedure


5. Click on save. Here you will see an error "We have not been able to verify your authority to this domain. Error 12" because you haven't set your DNS settings with GoDaddy yet.

Set Up A Custom Domain With Godaddy In Blogger - A Step By Step Procedure


6. In the error part you can see two set of lines with codes. Just dont close this page as we require this codes later in DNS settings in GoDaddy.

Set Up A Custom Domain With Godaddy In Blogger - A Step By Step Procedure


7. Now login into the GoDaddy website with which you have signed up during the process of Domain purchase.

8 Click on My Account at the top of the website or Domains at the middle

Set Up A Custom Domain With Godaddy In Blogger - A Step By Step Procedure


9. Now Click on Launch Button

Set Up A Custom Domain With Godaddy In Blogger - A Step By Step Procedure


10. You will get an page opened Names Domain Details. Click on DNS Zone File in that page

Set Up A Custom Domain With Godaddy In Blogger - A Step By Step Procedure


11. Now click on Use classic DNS Manager

Set Up A Custom Domain With Godaddy In Blogger - A Step By Step Procedure


12.  Now you will get a Page named Zone File Editor. There you will find first two tables called A (Host) and CNAME (Alias) respectively.

Set Up A Custom Domain With Godaddy In Blogger - A Step By Step Procedure


13. Now just below the CNAME (Alias) table there will be a button to add CNAMES to the table namely Quick Add. Click on it and enter two set of lines of code that are available in blogger settings page

Set Up A Custom Domain With Godaddy In Blogger - A Step By Step Procedure

14. Now click on SAVE FILE ZONE

Set Up A Custom Domain With Godaddy In Blogger - A Step By Step Procedure

15.  Refresh the page and now add following records to A (Host) table by clicking Quick Add button.
First BoxSecond Box
@216.239.32.21
@216.239.34.21
@216.239.36.21
@216.239.38.21
Set Up A Custom Domain With Godaddy In Blogger - A Step By Step Procedure

16. Now click again on SAVE FILE ZONE. Come back blogger settings page and clic on save button.

Set Up A Custom Domain With Godaddy In Blogger - A Step By Step Procedure

17. After saving you can see the error disappeared for the page and you will see page something like this.
 
Set Up A Custom Domain With Godaddy In Blogger - A Step By Step Procedure

18. To make sure that you are redirecting mywebsite.com to www.mywebsite.com click on Edit in above image and checkoption.

Set Up A Custom Domain With Godaddy In Blogger - A Step By Step Procedure

19. That's it! Now click on save as shown above. I know its bit lengthy process but i assure you its only for beginners. If you got two more blogs try this on them and I can bet you can do this whole process in a single shot.

Step 2 Completed 

20. Now sit back and relax for two mins. After two minutes open your blog ans see your URL changing to your domain name automatically.
Step 3 Completed 


Author's Note: If you liked my article please do share with your friends. Also please subscribe to the news letter for more awesome tricks and tips.

Read More

Saturday, June 28, 2014

Cool Social Subscribe Widget for Blogger

Posted by Muji

Hi guys today im going to present you an awesome widgets for your blogs.

This widget has a facebook like button, twitter follow button and rss feed subscrber form which can easily let you find more genuine customers for your blog. You can add this widget at the bottom of any posts or the top of any page according yo your choice. The widget looks like image below.


Now let me show the installation.

Step 1: Go to your blog dashboard → Template → Edit HTML

Step 2: Now find the code <data:post.body/>

Step 3: Now just below the <data:post.body/> paste the following code

<section class="newsletter"> <h2>
Tired of checking for new posts ?
</h2>
<div id="form-newsletter">
<div class="social facebook">
<a href="https://www.facebook.com/AllTechCorner" target="_blank">
      <img src="https://blogger.googleusercontent.com/img/b/R29vZ2xl/AVvXsEjX-V8RArbVONn1gXGny9CSBOu-eonxLgjuR76zqaT11EhX5bN-m5lkL-HfmTkr0z9LHx5WYEho3ARkQfjNNHTcVZdrNZMAvIXab8MRQKndZq-qgWFp51nLsbVHOOda8zPVdVjgdz-qnURB/s1600/nl-facebook@2x.png" />
    </a>
    <iframe allowtransparency="true" class="social-box fb-like" frameborder="0" scrolling="no" src="//www.facebook.com/plugins/like.php?href=https%3A%2F%2Fwww.facebook.com%2FAllTechCorner&amp;width=90&amp;height=21&amp;colorscheme=light&amp;layout=button_count&amp;action=like&amp;show_faces=false&amp;send=false&amp;appId=519648428126767&amp;locale=en_US" style="border: none; height: 21px; overflow: hidden; width: 90px;">
    </iframe>
  </div>
<div class="social twitter">
<a href="https://twitter.com/AllTechCorner" target="_blank">
      <img src="https://blogger.googleusercontent.com/img/b/R29vZ2xl/AVvXsEiQBj1-y7MT0dp8_uu_8uVkWCY7nukIov6_TI9A4q9QhLLtAM-YEQwnPKJ4DRju29cJYXBLUK7Soq85C2QyGMG-26HhaPFiy53sW0W-UUTDKB7JRUQsCgFEXMnqxaO4AKuPbAFD8R0aIaKY/s1600/nl-twitter@2x.png" />
    </a>
    <iframe allowtransparency="true" class="social-box twitter-follow-button twitter-follow-button" data-twttr-rendered="true" frameborder="0" id="twitter-widget-0" scrolling="no" src="http://platform.twitter.com/widgets/follow_button.1399599786.html#_=1399785529920&amp;id=twitter-widget-0&amp;lang=en&amp;screen_name=AllTechCorner&amp;show_count=false&amp;show_screen_name=false&amp;size=m" style="height: 20px; width: 60px;" title="Twitter Follow Button">
    </iframe>
    <script>
      !function(d,s,id){
        var js,fjs=d.getElementsByTagName(s)[0],p=/^http:/.test(d.location)?&#39;http&#39;:&#39;https&#39;;
        if(!d.getElementById(id)){
          js=d.createElement(s);
          js.id=id;
          js.src=p+&#39;://platform.twitter.com/widgets.js&#39;;fjs.parentNode.insertBefore(js,fjs);}}(document, &#39;script&#39;, &#39;twitter-wjs&#39;);
    </script>
  </div>
<div class="newsletter-form">
<fieldset>
<h2>
       Get all posts directly in your mail.
      </h2>
<div class="fields">
<form action="http://feedburner.google.com/fb/a/mailverify" method="post" onsubmit="window.openundefined'http://feedburner.google.com/fb/a/mailverify?uri=AllTechCorner', 'popupwindow', 'scrollbars=yes,width=550,height=520');return true" target="popupwindow">
<input class="email" id="email" name="email" onblur="ifundefinedthis.value=='')this.value=this.defaultValue;" onfocus="ifundefinedthis.value==this.defaultValue)this.value='';" type="text" value="Enter Your Email here.." />
          <input name="uri" type="hidden" value="AllTechCorner" />
          <input name="loc" type="hidden" value="en_US" />
          <input class="subscribe" name="commit" type="submit" value="Subscribe" />
        </form>
</div>
</fieldset>
</div>
</div>
</section>
<style>
.newsletter{text-align:center;margin:20px 0;}
.newsletter .social.facebook{background:none repeat scroll 0 0 #3661A0}
.newsletter .social{padding-top:20%;width:20%;float:left;position:relative}
.newsletter #form-newsletter{display:block;width:90%;max-width:900px;min-width:500px;margin:0 auto}
.newsletter:before,.newsletter:after{content:&quot; &quot;;display:table}
.newsletter:after{clear:both}
.newsletter h2{color:#3B434D;font-family:Open Sans,sans-serif;font-size:1.5em;font-weight:300;width:65%;margin:1em auto}
.newsletter .social.twitter{background:none repeat scroll 0 0 #00ACED}
.newsletter .social a{display:block;left:30%;position:absolute;top:20%;width:40%}
.newsletter .social a img{max-width:100%;width:100%;transition: transform 0.3s ease-out 0s}
.newsletter .social a:hover img{transform:scale(1.1)}
.newsletter .social .social-box{bottom:20px;left:50%;position:absolute}
.newsletter .social .social-box.fb-like{margin-left:-45px}
.newsletter .social .social-box.twitter-follow-button{margin-left:-30px}
.newsletter .newsletter-form{background:none repeat scroll 0 0 #1E293B;float:left;padding-top:20%;position:relative;width:60%}
.newsletter .newsletter-form fieldset{height:38px;left:10%;position:absolute;top:10%;width:80%;border:none}
.newsletter .newsletter-form fieldset h2{color:#FFF;font-family:Open Sans, sans-serif;font-weight:300;width:100%;margin:0 0 1.5625em;font-size:16px;}
.newsletter .newsletter-form fieldset .fields{position:relative}
.fields .email{border-radius:10px 0 0 10px;outline:0 none;width:84%;border:0;left:0;position:absolute;padding:10.5px}
.fields .subscribe{background:none repeat scroll 0 0 #F0553B;border:medium none;border-radius:0 10px 10px 0;color:#FFF;right:0;position:absolute;padding:11px;transition:all ease 0.6s;}
.fields .subscribe:hover {background: none repeat scroll 0 0 #161616;}
</style>
<script type="text/JavaScript">
fontsize = function () {
    var abtSubs = $(".newsletter #form-newsletter").width() * 0.025; // 10% of container width
    $(".newsletter .newsletter-form fieldset h2").css('font-size', abtSubs);
};
$(window).resize(fontsize);
$(document).ready(fontsize);
</script>
Note : There maybe more than one <data:post.body/> So make sure that you have selected the right one. If the widget does not appear try changing the location of code.

Also read
  1. 5 Awesome Ways To Earn Money Online
  2. AdSense Gets New Ad Sizes - New !!
  3. How To Add An Awesome Facebook Like Box To Your Blogger
  4. How To Create An Awesome Tabbed Content Site Map For Your Blogger
  5. How To Display An Awesome Looking Pop Up With Both Facebook Like Box and Subscription Box In Blogger
Step 5: Now replace the words in red color with desired words and save the template. That's it. You have got a wonderful Social Subscribe Widget for your Blogger.

Read More