Tuesday, October 21, 2014

5 amazing security tips for your android mobile/cellphone

Posted by Muji


There are a plenty of security applications in the Google Play store that help you defend your Android phone and offer choices that expand your possibilities of spotting your lost (or stolen) mobile.

Besides all the basic security tips like locking the mobile and SIM card, activating anti-theft in mobile. today im gonna show you some useful security tips for protecting your android.

Prey and Where's My Driod:

Prey and Where's My Droid are the two application with which you can send multiple command to your lost phone to execute the commands without your existence.

Android Device Manager:

Android Device Manager shows a list of all Android phones and tablets that are connected to your Google Account and helps you locate them on a Google Map. You can ring your phone (in case it is hiding somewhere you can't spot) from the browser, lock the device with a custom PIN or perform a factory reset which permanently deletes all the data on your phone. The mobile should be connected to data connection either its may be a mobile data or WiFi


Anti-Theft Alarm:

When you are charging your cell phone at a public station, you either have to watch the device all the time or you can activate the Anti-Theft Alarm app and relax a bit. The app will trigger a siren sound when someone disconnects the charger and your phone screen will flash continuously until the correct pin is entered. You can go a step further and configure the app to trigger an alert when someone moves the phone even a few inches from the original position.

Recommended for you: How To Download Youtube and Facebook Videos Without Any Software


LockWatch:

Another Android App LockWatch records the phone’s location and captures a picture with a front camera when someone attempts to unlock the phone but enters a wrong PIN or password. This information is send to your email address and it happen silently so the intruder would never know that their activity has been recorded.

Author's Note: If you liked my article please do share with your friends. Also please subscribe to the news letter for more awesome tricks and tips.

Read More

How to use two whatsapp accounts in a single mobile/cellphone

Posted by Muji
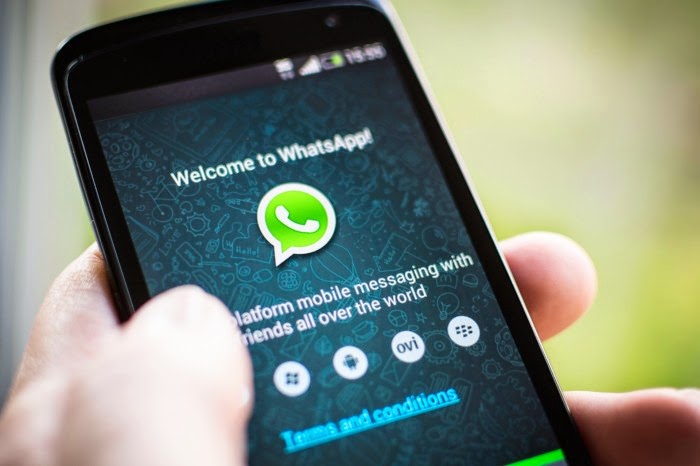
No Doubt WhatsApp is one of the most popular and downloaded messaging app. Most of the android users are using the same to connect with their friends. But if you have the dual sim phone than its difficult for your to setup two number on the Whatsapp and the application didn’t provide any option to use both the number on the same app. Now you can do the same on your device with he the simple trick. All credit goes to the XDA Member OsamaGhareeb, who recently released the modified version of whatsapp called OGWhatsApp. With the help of this application you can easily use two numbers on the whatsapp messaging application. The app is based on the latest WhatsApp version and works on any android device.

To get started all you have to install the modded version of whatsapp on your phone and make some change with the help of file explorer, and you are done. Lets take a look how to setup the application and use two numbers in WhatsApp at the same time.

Follow the below to get on the procedure

Step 1. Run the Whatsapp app on your application and go the Chat Settings and take the backup of your Whatsapp messages first. Its optional in case you want the restore your messages.


Step 2. Now Change the name of the folder /sdcard/WhatsApp on your device to /sdcard/OGWhatsApp. Use any file explorer (Like ES File Explorer or Astro File manager )to do this on your phone.


Step 3. Now uninstall the WhatsApp on your device and install the Modified version of OGWhatsApp here on your device.

Step 4. Now run the OGWhatsApp on your phone and use the old number which are you using on the whatsapp.

Step 5. Now Go to the Google play Store and install the official version of Whats app on your phone and use the new number on this application.

That’s it. Now you will see two Whatsapp icons on the homescreen of your phone from which you can use two number for the messaging.

Author's Note: If you liked my article please do share with your friends. Also please subscribe to the news letter for more awesome tricks and tips.


Related Keywords:
how to install whatsapp on android phone, how to install whatsapp on android phone from pc, download whatsapp for android phone, whatsapp for android 2.2 free download, how to use whatsapp on android tablet, how to use whatsapp on android tablet without sim card, how to use whatsapp on android emulator
how to use whatsapp on android sdk
Read More

How to shutdown/turn off PC/Computer with your mobile/cellphone device

Posted by Muji

What if you are out of your home and you are not sure whether you have shut your PC down or not?

Or what if you got a doubt that somebody else is using your system when you are not home?

Or what if somebody is accessing your private data and you want to shut your system down without knowing them?


Well I have a small trick for you.

All you can do with this trick is Shutdown Computer/Lappy with a Cell Phone

Using this method, a user can shutdown, restart, hibernate, etc. his or her computer, just by sending an email from his or her phone.

To do this, all you will need is Microsoft Outlook which should come with Microsoft Office, which most people have. This will need to be on the computer wish you wish to shutdown.

So, this is how you do this:

1. First, you need the batch files to perform the Shutdown, Hibernate etc. You can write them down yourselves.

2. Open your Notepad and write the following code

c:\windows\system32\shutdown -s -f -t 00

and save it as shutdown.bat (remember .bat is mandatory in order run this trick)

3. Open up Microsoft Outlook. Make sure that you have already configured it for your email. Now we need to make it so that Outlook checks your inbox about every minute (1 minute for testing time can be increased if a delayed shutdown is desired). You can do this by going to Tools --> Options in Microsoft Outlook.

4. Then click the Mail Setup tab, and afterwards, the Send/Receive button.

5. Make sure that the Schedule an automatic send/receive every box is checked, and set the number of minutes to 1. Now you may close all of these dialog boxes.

6. Now go to Tools --> Rules and Alerts. Next click the options button in the upper right hand corner and press the Import Rules button.

7. Now select the shutdown.bat file which you have created earlier.

8. Now, when you send a message from your phone to your e-mail address with the subject shutdown or smsshutdown%%, your computer will shutdown.

Author's Note: If you liked my article please do share with your friends. Also please subscribe to the news letter for more awesome tricks and tips.

Read More

Monday, October 20, 2014

Easy Steps On How To Run Whatsapp On PC

Posted by Chaithanya
Now-a- days whatsapp is a largest messaging platform where on can send messages for free of cost. It had became quiet popular and also the mostly used messaging application. It has 300 million customers world wide and 20 million customers alone in India. It can be used on mobile platforms like Android, Apple IOS, Windows, Blackberry. And now you can also use whatsapp in your PC also. Many members know this option, but they don't know how to install and run whatsapp on PC.

Here we will discuss easy steps on how to run whatsapp on pc by using Blue Stacks.


  • Download Blue Stacks application for Windows (free version)
                                               Download Bluestacks for Windows

  • After finishing download, double click on the downloaded file, Click continue and click install
  • Now download whatsapp apk for windows 
                                               Whatsapp APK for Windows

  • Now double click on the downloaded file and run it. Now whatsapp will be installed in your PC
  • Now open Blue Stacks icon on your desktop
  • Now in Blue Stacks --> Click My Apps
  • You can see Whatsapp --> click it
  • Accept terms and conditions that are provided
  • Now type your number in the mobile number field
  • Type Your Country Code before the number. For Ex. type 91 for Indian mobile numbers and respective codes for other countries.
  • Now Whats app will verify your number, but it shows a failure message
  • Now click on call me option --> You will receive a call back with a confirmation number. Write it down.
  • Now type the received number in the verification field and you are done. 
Now your whatsapp will run on PC. Enjoy it

we will discuss on how to add contacts to whatsapp

Step 1 : Open Whatsapp in BlueStack

Step 2: Click on Menu icon at the bottom

Step 3 : Now click on contacts icon

Step 4: Click on add contact

Step 5: Fill the required fields with name and number

Now you are done with your contacts list

This is the main procedure on how to run whatsapp on pc. Try it.
Read More

Facebook for Android APK Direct Download Link

Posted by Chaithanya
Facebook for android is a very popular application. But accessing the previous versions of facebook has become very tough. Facebook has been developing considerably new versions of facebook for android apk's  to make facebook experience comfortable. Now it has come up with new version facebook for android apk where the users can enjoy the rich experience at the time of browsing.


In this new version many changes are made to enhance the experience. The main changes that are made here are 
  • A new look and other design updates 
  • You can quickly navigate to different areas by simply swiping the screen
  • You can search anywhere with the new search button
  • More recent feeds and other feeds can be seen on right 
  • Reliability and speed are increased
You can download the facebook for android apk here


You can also download it from google play store.

Read More

Saturday, October 18, 2014

How to customize Blogger with Godaddy

Posted by Muji

What is it?

All the blogs in this planet spaced for the uniqueness. Unless you got an unique property you are not going to be shined to the edge. The same property will effect to core in choosing the default blogger domain i.e., sub-domain of blogspot.com or blogger.com.

Set Up A Custom Domain With Godaddy In Blogger - A Step By Step Procedure

To get your uniqueness effect I suggest you to set your default sub-domain of blogspot.com to custom domain with Godaddy. The main advantage of setting a custom domain is you will get an official representation of your website,

What are the advantages?

1) You will be noted on a special note in search engine directories and will be easier to index your content. SEO made easier.
2) It is easier to submit your website into directories and are more chances to get approved to be listed.
3) Your blog is no more a blog. It is a website now.
4. It will be more easier to spread the word, popularize or to pronounce the website name rather than adding blogspot.com or wordpress.com in the end.
5. You will get a personalized email like as info@website.com so that to aware audience yours is a unique website.
6. Last but not least, there are more chances to get approved by Adsense if you have a custom domain.

Looks good, is it easier?

Of-course its looks good and easier too. May be its a bit difficult for the first time but only for the first time.

Google provides us very easier process to set up a custom domain with blogger as blogger is owned by Google itself.

It takes about 10 mins to set up a custom domain with Godaddy in your blogger for the first time and for the rest of times it will be about 5 to 7 mins of process.

Why choose GoDaddy when there are many other hosting services?

Good question, why i'm choosing godaddy is

1) It's cheaper: Yes can you believe that you can change your blog into website for just 2$? or Rs 120/- ? They provide the same service for us

2) It's easier: All you have to do is signing up, buying domain, setting DNS settings (Will talk about DNS settings later) that's it.

3) It's faster: Damn its so fast that the next second of the settings you can have your website live while other hosting services may take up to 24 hours to bring it on live.

What else could you expect if these are only the main things to buy a domain and customize it?

Okay, go ahead. Show me the process:

Well there are 3 main steps in this process

1) Buying your domain
2) Setting your DNS settings
3) Feel awesome!

Buying your domain in GoDaddy:

1) Go to Godaddy website by clicking here

2) Choose your domain by entering your desired domain in the box and search whether its available or not

Set Up A Custom Domain With Godaddy In Blogger

3. Now click on continue to cart and buy the domain.

Step 1 Completed 

Now, Setting Your DNS (Domain Name Server) Settings:

1. Go to your blogger dashboard.
2. Navigate to Settings > Basic
3. Now click on + Setup a 3rd party URL for your blog

Set Up A Custom Domain With Godaddy In Blogger


4. Now enter your website name in the box eg: www.mywebsite.com

Set Up A Custom Domain With Godaddy In Blogger - A Step By Step Procedure


5. Click on save. Here you will see an error "We have not been able to verify your authority to this domain. Error 12" because you haven't set your DNS settings with GoDaddy yet.

Set Up A Custom Domain With Godaddy In Blogger - A Step By Step Procedure


6. In the error part you can see two set of lines with codes. Just dont close this page as we require this codes later in DNS settings in GoDaddy.

Set Up A Custom Domain With Godaddy In Blogger - A Step By Step Procedure


7. Now login into the GoDaddy website with which you have signed up during the process of Domain purchase.

8 Click on My Account at the top of the website or Domains at the middle

Set Up A Custom Domain With Godaddy In Blogger - A Step By Step Procedure


9. Now Click on Launch Button

Set Up A Custom Domain With Godaddy In Blogger - A Step By Step Procedure


10. You will get an page opened Names Domain Details. Click on DNS Zone File in that page

Set Up A Custom Domain With Godaddy In Blogger - A Step By Step Procedure


11. Now click on Use classic DNS Manager

Set Up A Custom Domain With Godaddy In Blogger - A Step By Step Procedure


12.  Now you will get a Page named Zone File Editor. There you will find first two tables called A (Host) and CNAME (Alias) respectively.

Set Up A Custom Domain With Godaddy In Blogger - A Step By Step Procedure


13. Now just below the CNAME (Alias) table there will be a button to add CNAMES to the table namely Quick Add. Click on it and enter two set of lines of code that are available in blogger settings page

Set Up A Custom Domain With Godaddy In Blogger - A Step By Step Procedure

14. Now click on SAVE FILE ZONE

Set Up A Custom Domain With Godaddy In Blogger - A Step By Step Procedure

15.  Refresh the page and now add following records to A (Host) table by clicking Quick Add button.
First BoxSecond Box
@216.239.32.21
@216.239.34.21
@216.239.36.21
@216.239.38.21
Set Up A Custom Domain With Godaddy In Blogger - A Step By Step Procedure
16. Now click again on SAVE FILE ZONE. Come back blogger settings page and clic on save button.
Set Up A Custom Domain With Godaddy In Blogger - A Step By Step Procedure

17. After saving you can see the error disappeared for the page and you will see page something like this.
 
Set Up A Custom Domain With Godaddy In Blogger - A Step By Step Procedure

18. To make sure that you are redirecting mywebsite.com to www.mywebsite.com click on Edit in above image and checkoption.
Set Up A Custom Domain With Godaddy In Blogger - A Step By Step Procedure

19. That's it! Now click on save as shown above. I know its bit lengthy process but i assure you its only for beginners. If you got two more blogs try this on them and I can bet you can do this whole process in a single shot.
Step 2 Completed 

20. Now sit back and relax for two mins. After two minutes open your blog ans see your URL changing to your domain name automatically.

Step 3 Completed 


Author's Note: If you liked my article please do share with your friends. Also please subscribe to the news letter for more awesome tricks and tips.

Read More

Friday, October 17, 2014

Now You Can Transfer Money Through Facebook

Posted by Chaithanya

In olden days, money is transferred through banks. Now-a-days every thing is on online and the cash transfer also became online. We can transfer through net banking, online transfer, transfer through card etc. 

But as Facebook rules all over the world, the money can be transferred through Facebook. Banks made an platform in the site where you can transfer money. Private sector banks like Kotak Mahindra Bank has already launched instant fund transfer service in India and also many banks have followed the procedure. KMB provides their users where they can transfer the fund to their friends on social media network real time and with absolute free cost. 

It says, it can transfer the money via Facebook and the sender and receiver may not be the KMB customers. It uses IMPS (immediate payment service) platform where the money can be transferred. The IMPS platform has 28 banks under it and provide authority to transfer your funds. The sender has to first register on a dedicated website for the initiative called "Kay Pay" where we have to provide all the details and your bank account number and bank's MMID (mobile money identification number) apart from personal credentials.

Once the user has registered, he can initiate the fund transfer.

It is totally secured even in the event of Facebook account because it provides the two factor authentication to complete the transaction. And also it provides the expiry time for the transaction.

At present, top banks like ICICI allows their users to transfer the money through the social networking site Facebook.
Read More